
Instead of manually running a report each time you need it, SmartRoutes lets you schedule reports to be generated and emailed to you automatically at a set frequency.
This is useful for recurring checks like daily stop summaries or weekly performance reports, without needing to log in and pull the data yourself.
Option 1: Schedule a report from within the report itself
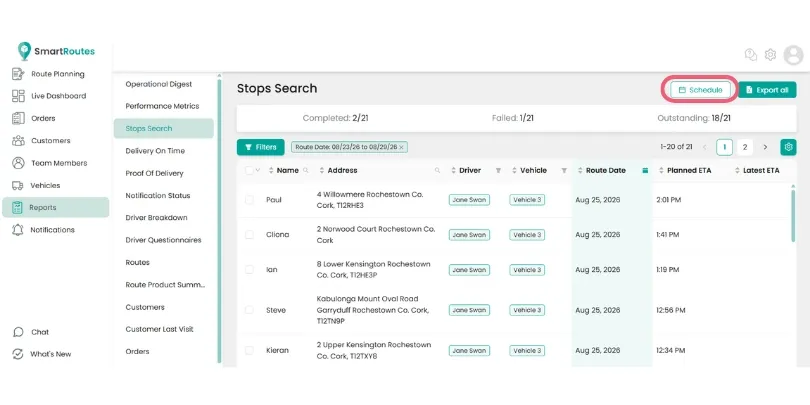
- Open the report you want to schedule.
- Customize the columns you want included, keep the defaults or deselect any you don't need.
- Click Schedule in the top right corner.
- Give the scheduled report a name, choose the date range it should cover (for example, "yesterday"), and set the frequency (daily, weekly, or monthly) along with the send time.
- Add up to five recipients who should receive the report by email.
- Save the schedule.
Recipients will then receive an Excel spreadsheet or CSV file by email, containing the same columns and data you set up.
Option 2: Manage scheduled reports from Settings
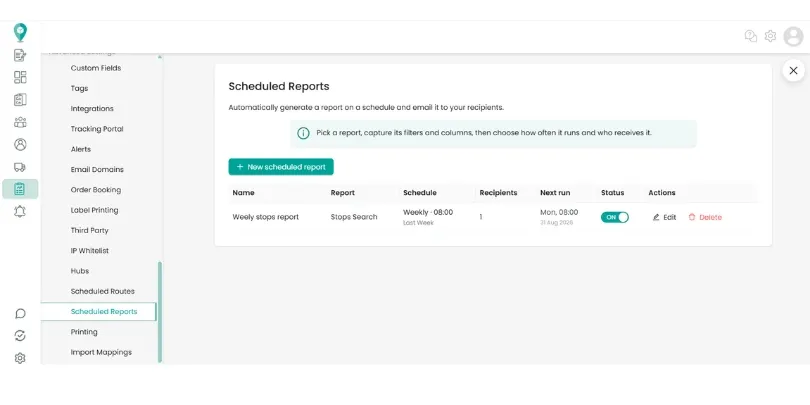
- Go to Settings.
- Select Scheduled Reports from the menu.
From here you can:
- View all reports you've already scheduled.
- Edit an existing scheduled report.
- Turn a schedule on or off without deleting it.
- Delete a scheduled report you no longer need.
- Create a new scheduled report directly from this screen.
Related guides
Didn't answer your question?
You can browse our other guides or contact support at support@smartroutes.io.
Was this guide helpful?
Yes
No
Please provide us with some additional feedback
Submit
Thanks for your feedback. It is greatly appreciated