
Planning your first route in SmartRoutes takes just a few steps: get your delivery data in, generate optimized routes, then review and dispatch to your drivers. This guide walks through the full process, using the current version of the app.
Step 1: Create a new plan
- Click Create New Plan in the top right corner.
- Choose how you want to add your delivery data:
- Create new plan from spreadsheet: upload a spreadsheet of stops
- Manual upload: add stops one at a time
- Integration with a third party: pull orders directly from a connected platform like Shopify or WooCommerce
For most first-time plans, uploading a spreadsheet is the fastest way to get started. If you haven't set up an integration yet, see the Integrations guide for the full list of supported platforms.
Step 2: Upload and match your spreadsheet
If you're uploading a spreadsheet:
- Click Choose file and select your spreadsheet.
- Select the correct sheet if your file has more than one.
- SmartRoutes will process the columns and attempt to match them to the correct fields automatically.
- Check that each column is matched correctly, for example address, name, and time window, and adjust any that aren't.
- Click Finish matching once everything looks right.
Getting the column matching right at this stage saves time later, since incorrect matches (like a phone number mapped to an address field) can cause stops to fail or plot incorrectly on the map. For more detail on formatting your file correctly, see How to Format and Upload Spreadsheets and CSV Files.
Step 3: Generate your routes
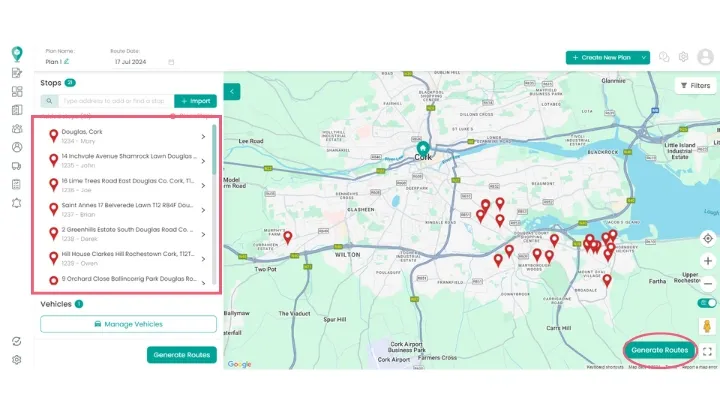
Once your stops have processed, they'll appear plotted on the map.
- Review your stops on the map to confirm everything has loaded correctly.
- Click Generate Routes.
- SmartRoutes will prepare and optimize your routes based on your stops, vehicles, and drivers.
Once generated, your routes will appear both on the map and in the sidebar, along with a breakdown of each route, how much time has been allowed per stop, and which vehicle is assigned.
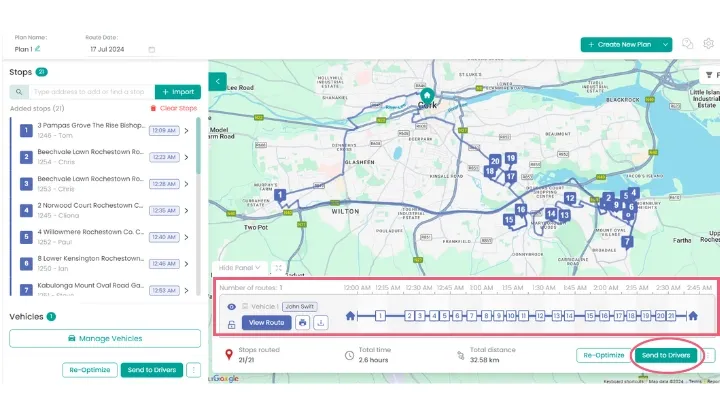
Step 4: Review and adjust before dispatching
Before sending routes to your drivers, it's worth reviewing what's been generated. You can:
- Add or delete stops
- Add time windows
- Adjust individual stop durations
- Manage vehicles and drivers assigned to each route
Once you've made changes, click Re-Optimize to update the route based on your edits. For the full breakdown of everything you can edit at this stage, see How to Edit a Draft Route.
Step 5: Dispatch to your drivers
Once you're happy with your routes, dispatch them to send the details straight to your drivers' phones. Each driver receives their assigned stops, turn-by-turn navigation, and any notes you've added.
For the full walkthrough, see How to Dispatch a Route. If you need to make changes after a route has already been dispatched, see How to Edit a Live (Dispatched) Route.
Related guides
- How to Add Collection and Delivery Stops
- How to Set Up Stop Durations
- How to Setup Recurring Routes
- How To Adjust The Start Time Of A Route
Didn’t answer your question?
You can see our other guides here or contact support at support@smartroutes.io.
Please provide us with some additional feedback
Thanks for your feedback. It is greatly appreciated