How to take proof of delivery
How to take proof of delivery in your SmartRoutes app

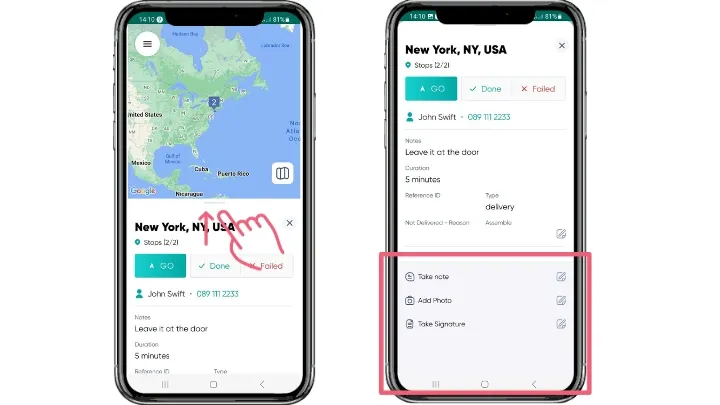
Once you are logged into the driver app and have started your route, you can start taking proof of delivery as you complete deliveries. You can take POD through SmartRoutes in a few ways. 1. Photo, 2. E-signature and 3. Barcode Scan.
In order to choose either photo or e-signature, you can swipe up when you’re on the following screen and then choose your preference.
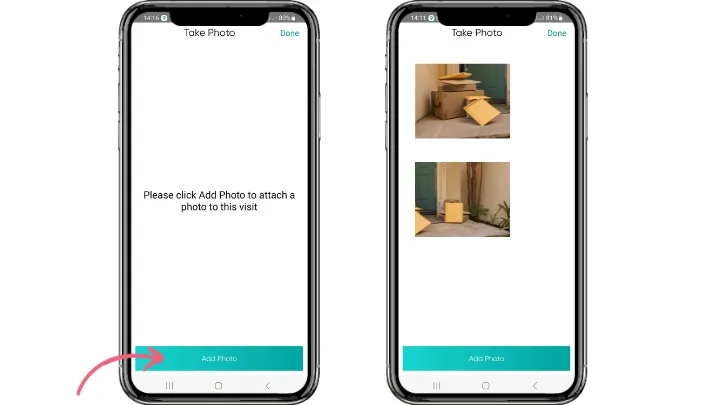
1. Photo
To take photo proof of delivery click on the button that says ‘Add Photo’. You will be brought to the next screen from which you can add a photo either by capturing it in real time or upload a picture from your gallery. It will then appear in a grid (as shown below) and you have the option to add additional photos as required.
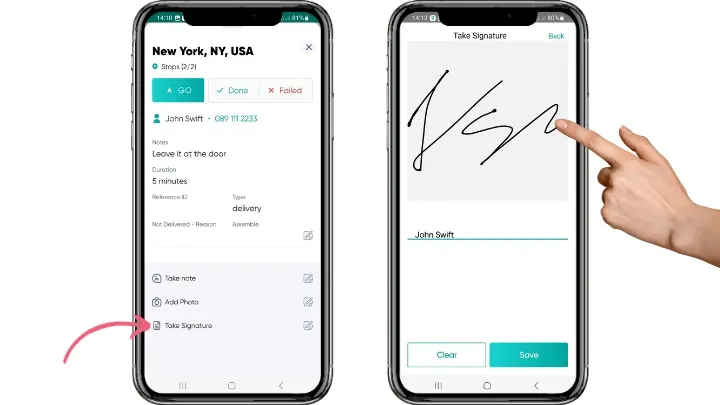
2. E-signature
To take an e-signature you can navigate to the menu in the same way as previously mentioned and this time click on ‘Take Signature’. You will then be brought to a screen where you can offer the person receiving the order the phone and they can sign in the box using their finger and then type in their name as well.
3. Barcode Scanner
To scan a barcode click on the 3 lines as indicated below to expand the menu. Then click ‘Barcode Scan’. You will be able to scan the barcode right away using your mobile device.

That’s it! All PODs collected will be saved to the account where office staff can search through them as required.
Happy Routing!
Didn’t answer your question?
You can see our other guides here or contact support at support@smartroutes.io.
Please provide us with some additional feedback
Thanks for your feedback. It is greatly appreciated