
Step 1: Turn on Zones
To use zones in SmartRoutes first click on settings in the top right hand corner and toggle ‘Zones (Geographical)’ ON.
Then click ‘Save’.
Step 2: Draw/Create your Zones
Now click ‘Route Planning’ on the left hand menu and open a draft plan to open the map view. Now you can start creating your zones.
Click on the drawing tool shown in the image below.
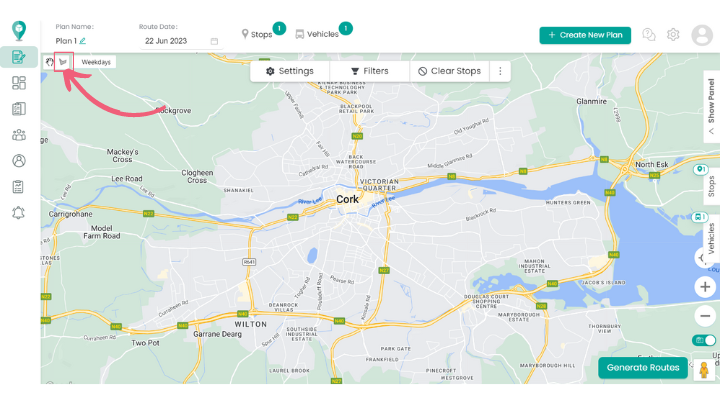
Next, click on the map and keep ‘clicking’ on various points to draw your desired shape (ie. zone).
Once you have finished drawing your zone you will be able to name this zone and add a driver(s).
You can continue with this process as many times as required.
Step 3: Create Zone Groups
Do your zones change? For example, do you delivery to North and South zones on Weekdays and East and West on Weekends?
No problem!
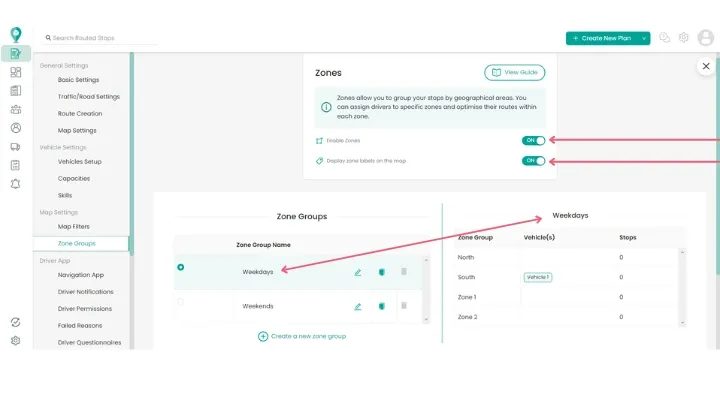
Navigate to the settings menu and click ‘Zone Groups’ then click the plus sign and ‘create a new zone group’. Once you have named your zone group, you can exit this screen.
Now you can create your zones for this group as before. It’s that easy!
You can check what zones you have created per group in the ‘Zone Groups’ menu.
Happy Routing!
Didn’t answer your question?
You can see our other guides here or contact support at support@smartroutes.io.
Please provide us with some additional feedback
Thanks for your feedback. It is greatly appreciated