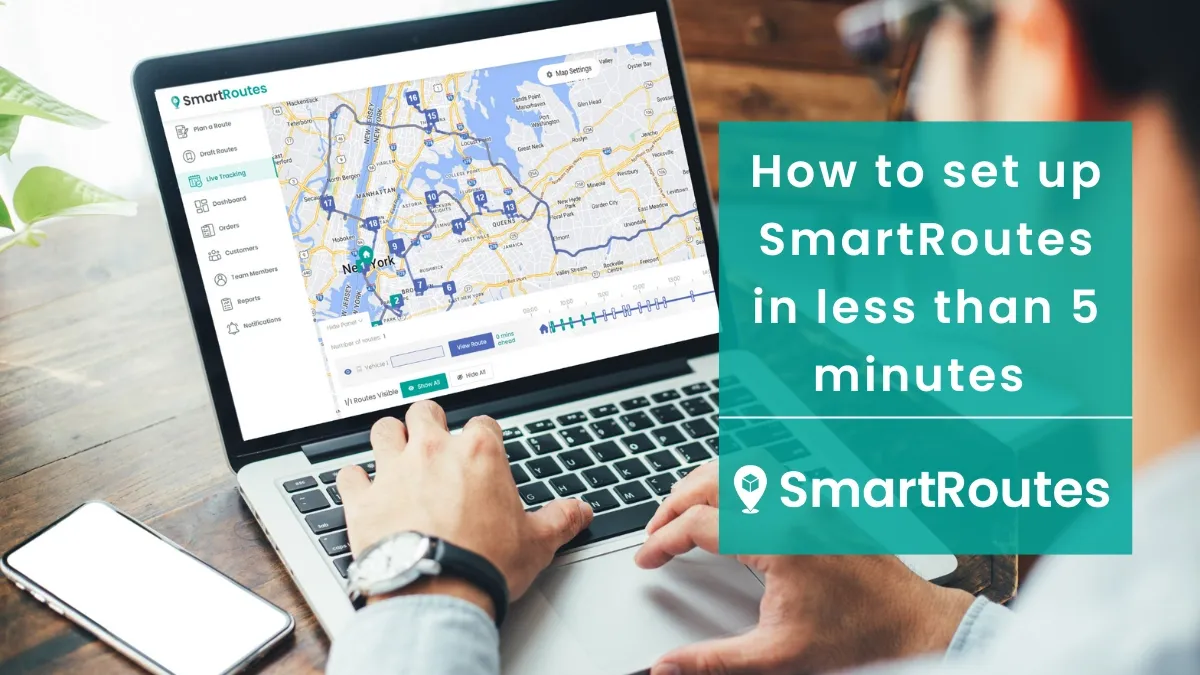
How to set up SmartRoutes in less than 5 minutes
Our step-by-step instructions on how to get set up with SmartRoutes with a basic dashboard in less than 5 minutes.

SmartRoutes provides a seamless solution that enables businesses of all sizes to streamline their delivery processes and deliver exceptional service to their customers. With SmartRoutes, you can optimize your delivery routes and save time, fuel, and money.
In this article, we'll walk you through the simple steps to set up SmartRoutes in less than 5 minutes and start reaping the benefits right away!
Step 1: Sign Up for SmartRoutes
The first thing you need to do is visit smartroutes.io and sign up for a free trial account. Simply click on "Sign Up" in the top right corner of any page and fill in your details to create your free account. You can start using this account or if you want access to more features, you can purchase a subscription that suits your needs.
Sign up for SmartRoutes
Streamline your entire delivery process, all from one platform

Step 2: Upload your Data
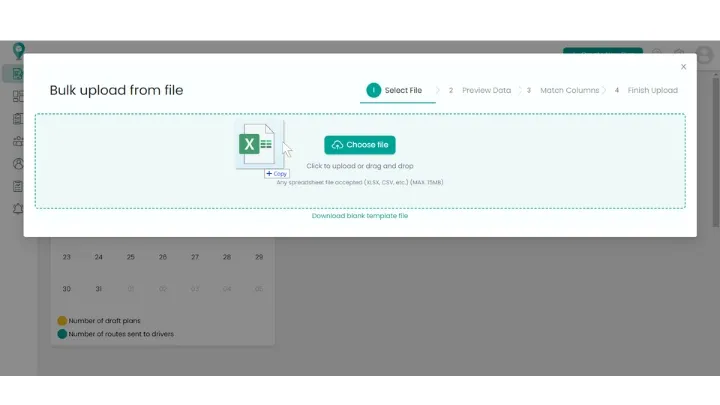
Once you've created your account, it's time to upload your delivery details. SmartRoutes provides an intuitive interface where you can easily add your delivery stops. You can manually enter the addresses or import them from a spreadsheet or CSV file. SmartRoutes also offers integration options with popular e-commerce platforms, making it even more convenient to import your data.
Pro tip: Download this blank template to organize your data.
Step 3: Customize Your Settings
SmartRoutes offers a range of customization options that allow you to optimize your routes according to your specific needs. By adjusting these settings, you can ensure that the routes generated by SmartRoutes are tailored to your business requirements.
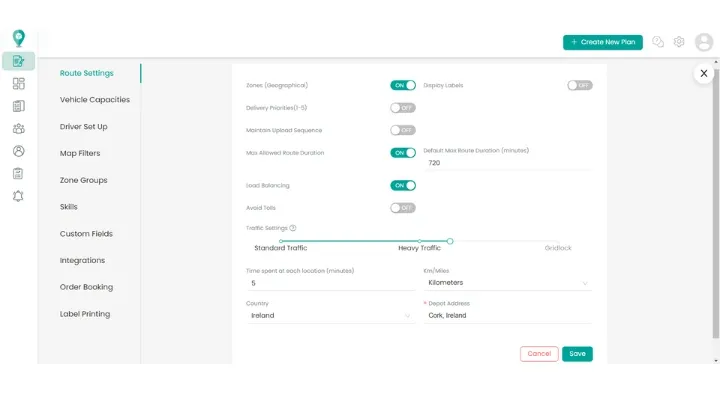
You can set your preferred start and end locations. This is particularly useful if you have a central hub or depot where your drivers begin and end their routes. Define time windows for deliveries for customers who are only available for deliveries during specific hours.
You can specify vehicle capacities if you have multiple vehicles with varying capacities. This allows SmartRoutes to consider these constraints during optimization process. Designate priority stops within your routes. Some deliveries may require special attention or have higher priority than others.
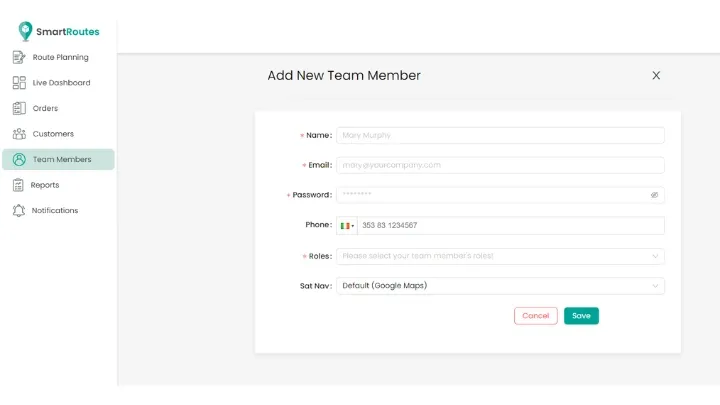
Step 4: Set up Drivers
Click on settings and navigate to ‘Team Members’ in the menu. Input your drivers’ details, it’s that simple!
Step 5: Optimize Your Routes
Once you've inputted your locations and customized your settings, it's time to optimize your routes. Click on the "Generate Routes" button and SmartRoutes will analyze your data and calculate the most efficient routes for your deliveries. This process takes only a few seconds and you'll be presented with optimized routes on your screen!
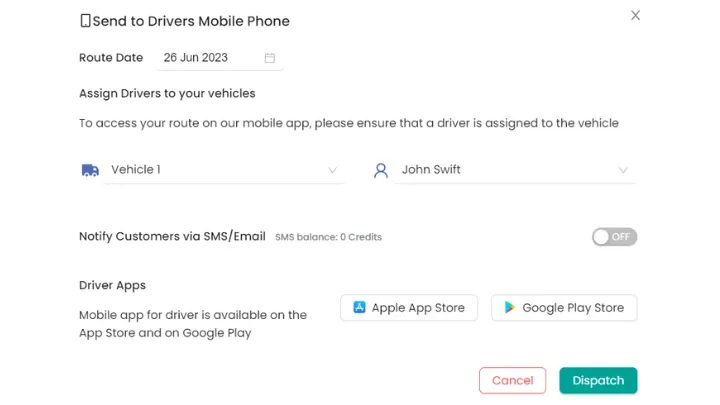
Step 6: Review and Send to Drivers
Take a moment to review the routes and make any necessary adjustments if needed. Once you're satisfied, you can send the routes to your driver(s). Assign your drivers and set up notifications at this stage, if you wish. (Make sure your driver has downloaded the SmartRoutes app on Android or IOS.) Now click ‘dispatch’ and your drivers will receive the route directly on their phone.
Step 6: Hit the Road!
Congratulations! You've successfully set up SmartRoutes and optimized your delivery routes. Share the routes with your drivers, and watch as they navigate through the most efficient paths, saving time and fuel. With SmartRoutes, you'll experience improved productivity, reduced costs and happier customers.
That’s it!
By following these simple steps, you can set up SmartRoutes in less than 5 minutes and streamline your delivery operations. Need more help getting set up? No problem! Reach out to our support team support@smartroutes.io.
Frequently asked questions
1. What devices or platforms are compatible with SmartRoutes?
You can use the desktop app via any search engine, and we have mobile apps compatible with both IOS and Android. We have out-of-the-box plugins with WooCommerce and Shopify. We also integrate with Mintsoft, SAP, Salesforce, Herbst, Microsoft Dynamics 365, and Azyra. Additionally, SmartRoutes Open API allows any business to plug the power of SmartRoutes into whatever system they are using.
2. Is SmartRoutes free to use, or are there any subscription fees?
We offer a 7-day free trial and don't require your card details. Subscriptions start at €29 per month. There are 4 subscription types available: Basic, Standard, Premium, and Enterprise. If you choose to be billed annually, you will receive 10% off for the entire year. You can contact sales@smartroutes.io for more information on Enterprise.
3. Do I need technical expertise to set up SmartRoutes?
No, it requires little to no technical knowledge due to its user-friendly design. We offer onboarding sessions to those that require it. We also have a guides section on our website where you can find useful information on various aspects of the platform. You can find our guides here.
4. What are the key features and benefits of using SmartRoutes?
Main Features:
- Route planning and optimization: ensures that drivers take the most efficient paths to reach their destinations.
- Delivery driver app with live tracking: monitor your drivers' progress and make adjustments as needed.
- Delivery and order management: track order status easily and ensure timely deliveries.
- Proof of delivery: capture PODs for improved accountability and record-keeping.
Benefits:
- Save time by automating route planning.
- Reduce fuel costs with efficient routes.
- Improve customer communication with delivery notifications.
- Enhance overall efficiency with real-time tracking and adjustments.
5. How can I troubleshoot common issues when setting up SmartRoutes?
First, check our guides for common issues you may encounter when setting up SmartRoutes. If you cannot find the answer to your question, please contact support@smartroutes.io.
If you enjoyed this blog, you might also be interested in:
 Caroline Hassett
 Caroline Hassett